Wednesday, 5 February 2014

Banana Bread Recipe

In a perfect world, men and women would be checking their mail in the morning, waving hello to to their neighbour who is just on their way to work.
"Good morning Mr. Smith!"
"Good morning to you too!"

In a perfect world, people would rush over to meet their new neighbours with baked goods in hand, and asking if they can help with any thing.

I want to live in that world.
So I'm going to make it happen. We have a new neighbour, and I've been watching her move her stuff in for the past few days (I know... I sound totally creepy right?)
Anyway, I started pinning neighbour gift ideas on Pinterest, but I never get to the store, and I don't really have any cash to spend...lammmmeee.
So I opened up my trusty recipe book, and got to work.


Banana bread is a big treat around here...we usually never have ripe bananas left over for baking because my husband eats them all. he will probably cry a bit because I am giving this banana bread away actually...

I didn't take any pictures of the actual baking because I never intended for this to be a blog post. I decided after I wrapped the bread up all cute, that I had to share it!

Here is my favorite recipe for banana bread. I don't remember where or who I got it from, it is not my own recipe, but I would like to share it with you :)

Banana Bread
Ingredients:
3 or 4 ripe bananas
1/3 cup melted butter
3/4 cup sugar
1 egg
1 teaspoon vanilla
1 teaspoon baking soda
pinch of salt
1 1/2 cup flour

Preheat oven to 350F
Mix mashed up bananas with the melted butter in a large mixing bowl.

add in the sugar,egg,vanilla,baking soda,salt, and flour,mix until well blended.
Pour mixture into a greased bread pan and bake for 1 hour.
then cool on rack!

Super easy, and you can add in whatever you want, like maple, or blueberries....we like blueberries.

Enjoy!


Quickest Valentines banner EVER!

Valentines is coming! But to be honest, I haven't exactly been crafting for it this week.
Instead I've buckled down with my crochet projects and finished some stuff up. I want to make enough inventory to actually be able to sell at a craft fair this year. *goals*

I would post tutorials for crochet projects, but truth be told, you would be so very confused because half the time I can't tell the difference between a double crochet, or a triple crochet, and I have to google it.

BUT I do have a quick DIY bunting idea for you! I love quick crafts because half the time I have a baby hanging off me needing my full attention. So here it is!

Quick Valentine Bunting!


You Will Need:
-paper (I used vintage sheet music I found at the thrift store for 25 cents!)
-red or pink paint
-paint brush
-scissors
-string
-hole punch (I also found this at the thrift store for $1!..you can see I still haven't removed the price tag..hah!)


 Take your paper and stack it all together so you can cut more than one piece at once. Cut it into strips. It doesn't matter what size you make them, as long as the strips stay close in size.


I cut mine into three strips. 


 Then cut those strips in half.


Cut little triangles out of the bottom


punch two holes in the top


Paint hearts on. I like that you can still see the music notes through the paint.


String some string through the holes, and your donnnnnneee!

So quick, and so very easy!

What crafts have you been doing for the big day of love?

Thursday, 30 January 2014

Lemonade Makin' Mama Giveaway

Hey everyone! Just wanted to let you know that Sasha from Lemonade Makin' Mama is hosting a give away with goodies from some really beautiful,talented women!

I have been following Sasha for a while now on Instagram, and I check into her blog every so often. She has beautiful words, a lovely home, and has the most amazing Etsy Shop EVER! (It reopens on February 5th! so mark it on your calendars!)


So head on over to Lemonade Makin' Mama to enter :)

Wednesday, 29 January 2014

Creative Play


How do I put this...My kids watch too much TV. They play while watching, or take off and play with each other and then take a break and watch a show, but the TV is almost always on in the back ground.

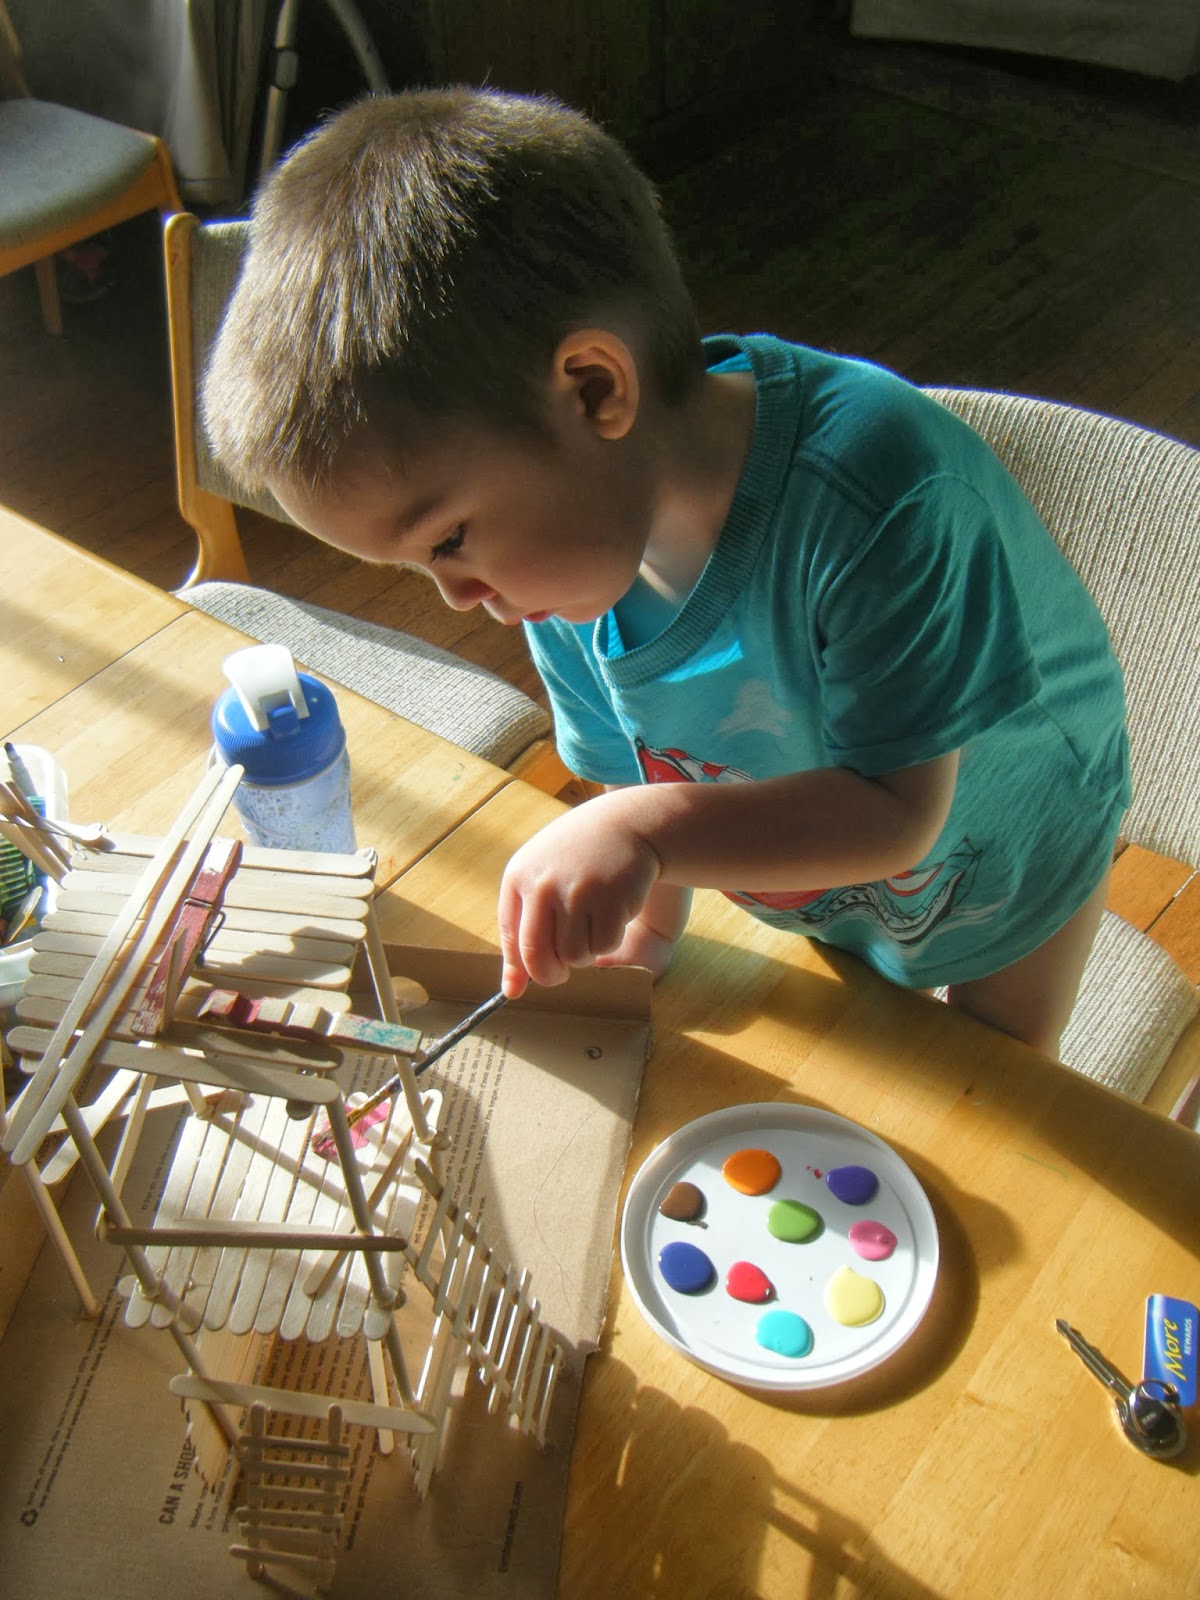
I'm not the perfect mom who has dinner ready, the floors swept, and I certainly don't always have them playing something they can learn from. But sometimes, I do pretty good. Like today. Today we built a house.


I brought out all our craft sticks, a glue gun, a cardboard surface from the recycle bin, and we got to work.


I started the base, and I controlled the glue gun (obviously because glue guns are hot hot hot, and my kids are small small small!)


From there, I made exactly what Mr.Sensitive told me to make.
"Make a ladder Mamma!"
"We need a roof here!"
"This stick has to go here"

He also sang the theme song from Bob the Builder the whole time (see what I mean by too much TV?)


Then my kiddo got artsy and made a clothes pin sculpture on the very top. 


After he said we were done building, I got him some paint so he could make it his own.


I use recycled lids from plastic containers as paint trays. Acryclic paint washes right off of the plastic with hot water.


Right now, he has his transformers inside the stick house and it's their hide out, and he's been playing quietly for a good hour...which doesn't happen often.

He has a million little toys he can use to play with his new house, and there's a lot of room to build onto it in the future.

Happy Crafting!

Saturday, 25 January 2014

Mini 'Pallet' Valentines Display

I have been looking for something to do with my giant bag of popcicle sticks. Seriously..I have a million wooden sticks and have no idea what to do with them.
Then yesterday, I was walking home from the park with the family, and someone had a bunch of pallets in their yard. I decided to make a 'mini pallet' with the sticks and paint it for valentines!
Polka dot Valentines 'mini pallet'


You Will Need:
-Glue Gun and Glue Sticks
-Popcicle Sticks (about 13ish of'em)
-Paint (I used white and red acrylic)
-Paint Brush
-Nail File
- Gold Polka Dots (not pictured)


Line up two popcicle sticks, and start gluing the rest of the sticks across them like the picture.


When your done it should look like the picture above. (I trimmed off the little nubs on the bottom,but it's not a must)


next your going to paint your 'pallet' whatever color you want! I realllly love this antique white.


Ta Da! all painted and dried!


If you don't want a distressed look, skip this part. If you love the distressed look, then take a nail file, and file away until you get the look you're going for.


Paint a heart


I added some gold polka dots because who doesn't love gold polka dots?!

And last, I found a tutorial the other day for making an easel out of paper straws over at Wants and Wishes

Happy Crafting Lovlies!


Friday, 24 January 2014

Our New Neighbor


Yesterday we decided to go run some errands, and stopped in at our local Staples store.
Every time we go in there, Dru goes to look at electronics, and I head straight for the Martha Stewart office supplies. To my absolute surprise, they had a lot of things on clearance! Plus another 20% off the clearance price! I scored some dry erase stickers, chalkboard labels, and some book plates. I should have got more...and will probably go back. 


I have also finally got my cousins baby care packaged ready to send! I procrastinate a little bit...but I had some fun decorating the wrapping with some washi tape as you can see.

And now, onto the most exciting thing that has happened! Yesterday we had some new neighbors move in! and they are the fuzziest most cute little things in the world!


Don't you just want to squeeze it and love it!!??
There are two rabbits who live in our yard, and they let you sit beside them and watch them without worry.
It has been really hard not to run outside and start offering them carrots,because they are wild animals after all, and to mess with nature is never a good thing, so we just watch, and appreciate their company.

This house has been absolutely wonderful when is comes to wild animals. We have a bear that visits the blackberry bush out back (NOTE: our back yard is very large, and the bear is very neat to watch, but we never get close and always stay on the deck), and we have our friendly deer (two females, their children, and some times if we are lucky, HUGE bucks!), and then some raccoons from time to time. The only bad experience we've had with animals were a few rats getting into the house, but that's been fixed!

Anyway I'm going to go enjoy our little furry friends company some more!

Wednesday, 22 January 2014

Mr.Sensitive


This is Mr.Sensitive.
A three year old with a passion for Power Rangers, golfing, painting, and cuddling.
He hates vacuum cleaners, going to bed, and when his sister pulls his hair.

He was my first born, and saved my life. I honestly think I would be on the streets somewhere if it wasn't for him coming into our lives.
He was a kicker in my belly,and always had hiccups.
He scared us at birth because he wasn't breathing, and then a lung collapsed, but he bounced right back.

He is soft spoken, polite,and says the sweetest things like "Mommy, I love you forever and always". (Melts the heart right!?)

The other night, he woke up crying, so I came up stairs and snuggled up next to him. I watched him fall back asleep, and I watched him sleep for a little bit longer...just because.

He was my glass baby...in the sense that he was my first born and I was scared of breaking him. I was extra gentle changing him, woke up to check on him countless times at night, when he got even the smallest booboo, I was rushing straight to emergency to make sure he was all right. I read all the parenting books, joined forums, and had all the things I thought I needed to prepare for a baby.

Anyway, here, on my blog, he will be known as Mr.Sensitive, and his sister will be known as Trouble. because those are words that describe their personalities perfectly.haha